
How to test requests using the popular Postman application
Postman is a popular and powerful API tool that allows you to build API requests using a GUI from your desktop without having to know cURL or other programming languages. You can use Postman during development to test API endpoints, or you can use it to access your real-world Snipe-IT installation (self-hosted or hosted with us) - and all of the API calls documented within the Snipe-IT API documentation here can be reproduced using Postman.
If you're new to Postman, getting started can be a little daunting, but you'll soon see it's not that difficult.
1. Install Postman
Go to https://www.postman.com and download the application for whatever desktop platform you're using.
2. Generate an API token
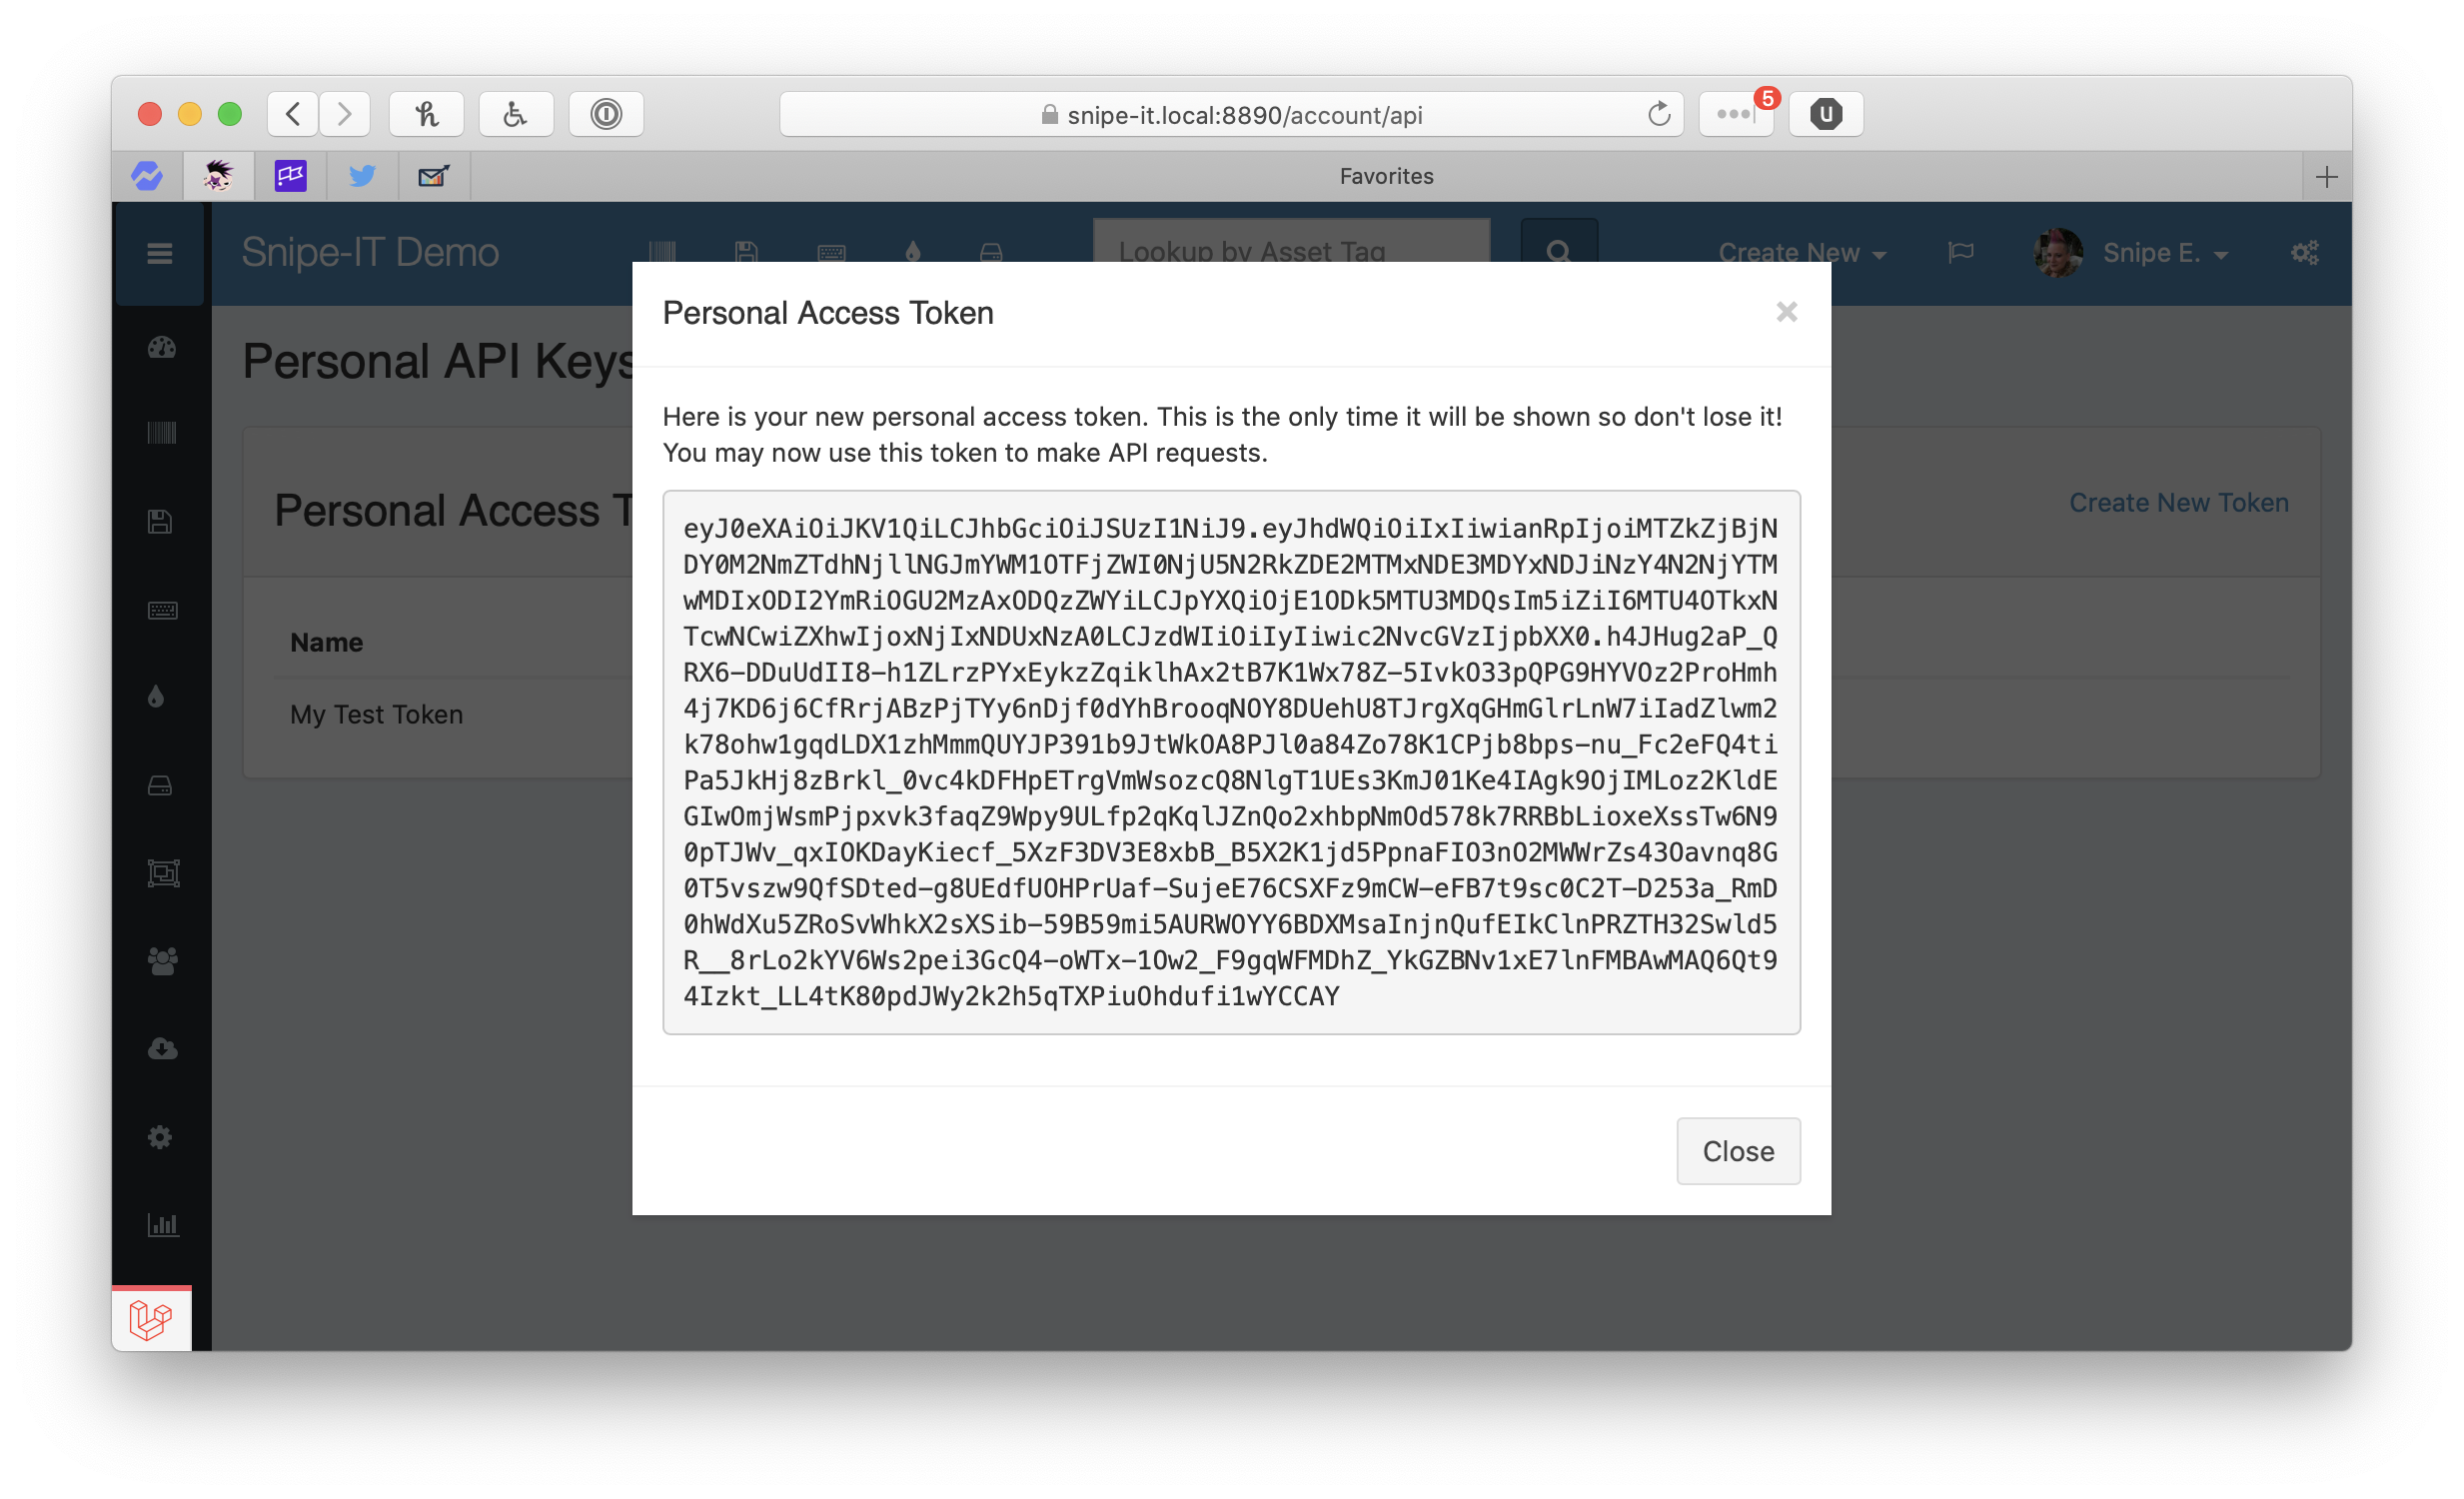
Follow the directions on Generating an API Token. Once you hit "Create", the window should return what looks like a long string of characters. Make sure you copy this down somewhere.
The API token will only be shown to you ONCE, so make sure you store it in Postman or somewhere else while you're getting this set up.
If you get a "Whoops" message when creating your first API token...run
php artisan passport:installfrom your Snipe-IT project root.
That long string of letters and numbers is your API personal access token. You'll need this in every call you make to the Snipe-IT API.
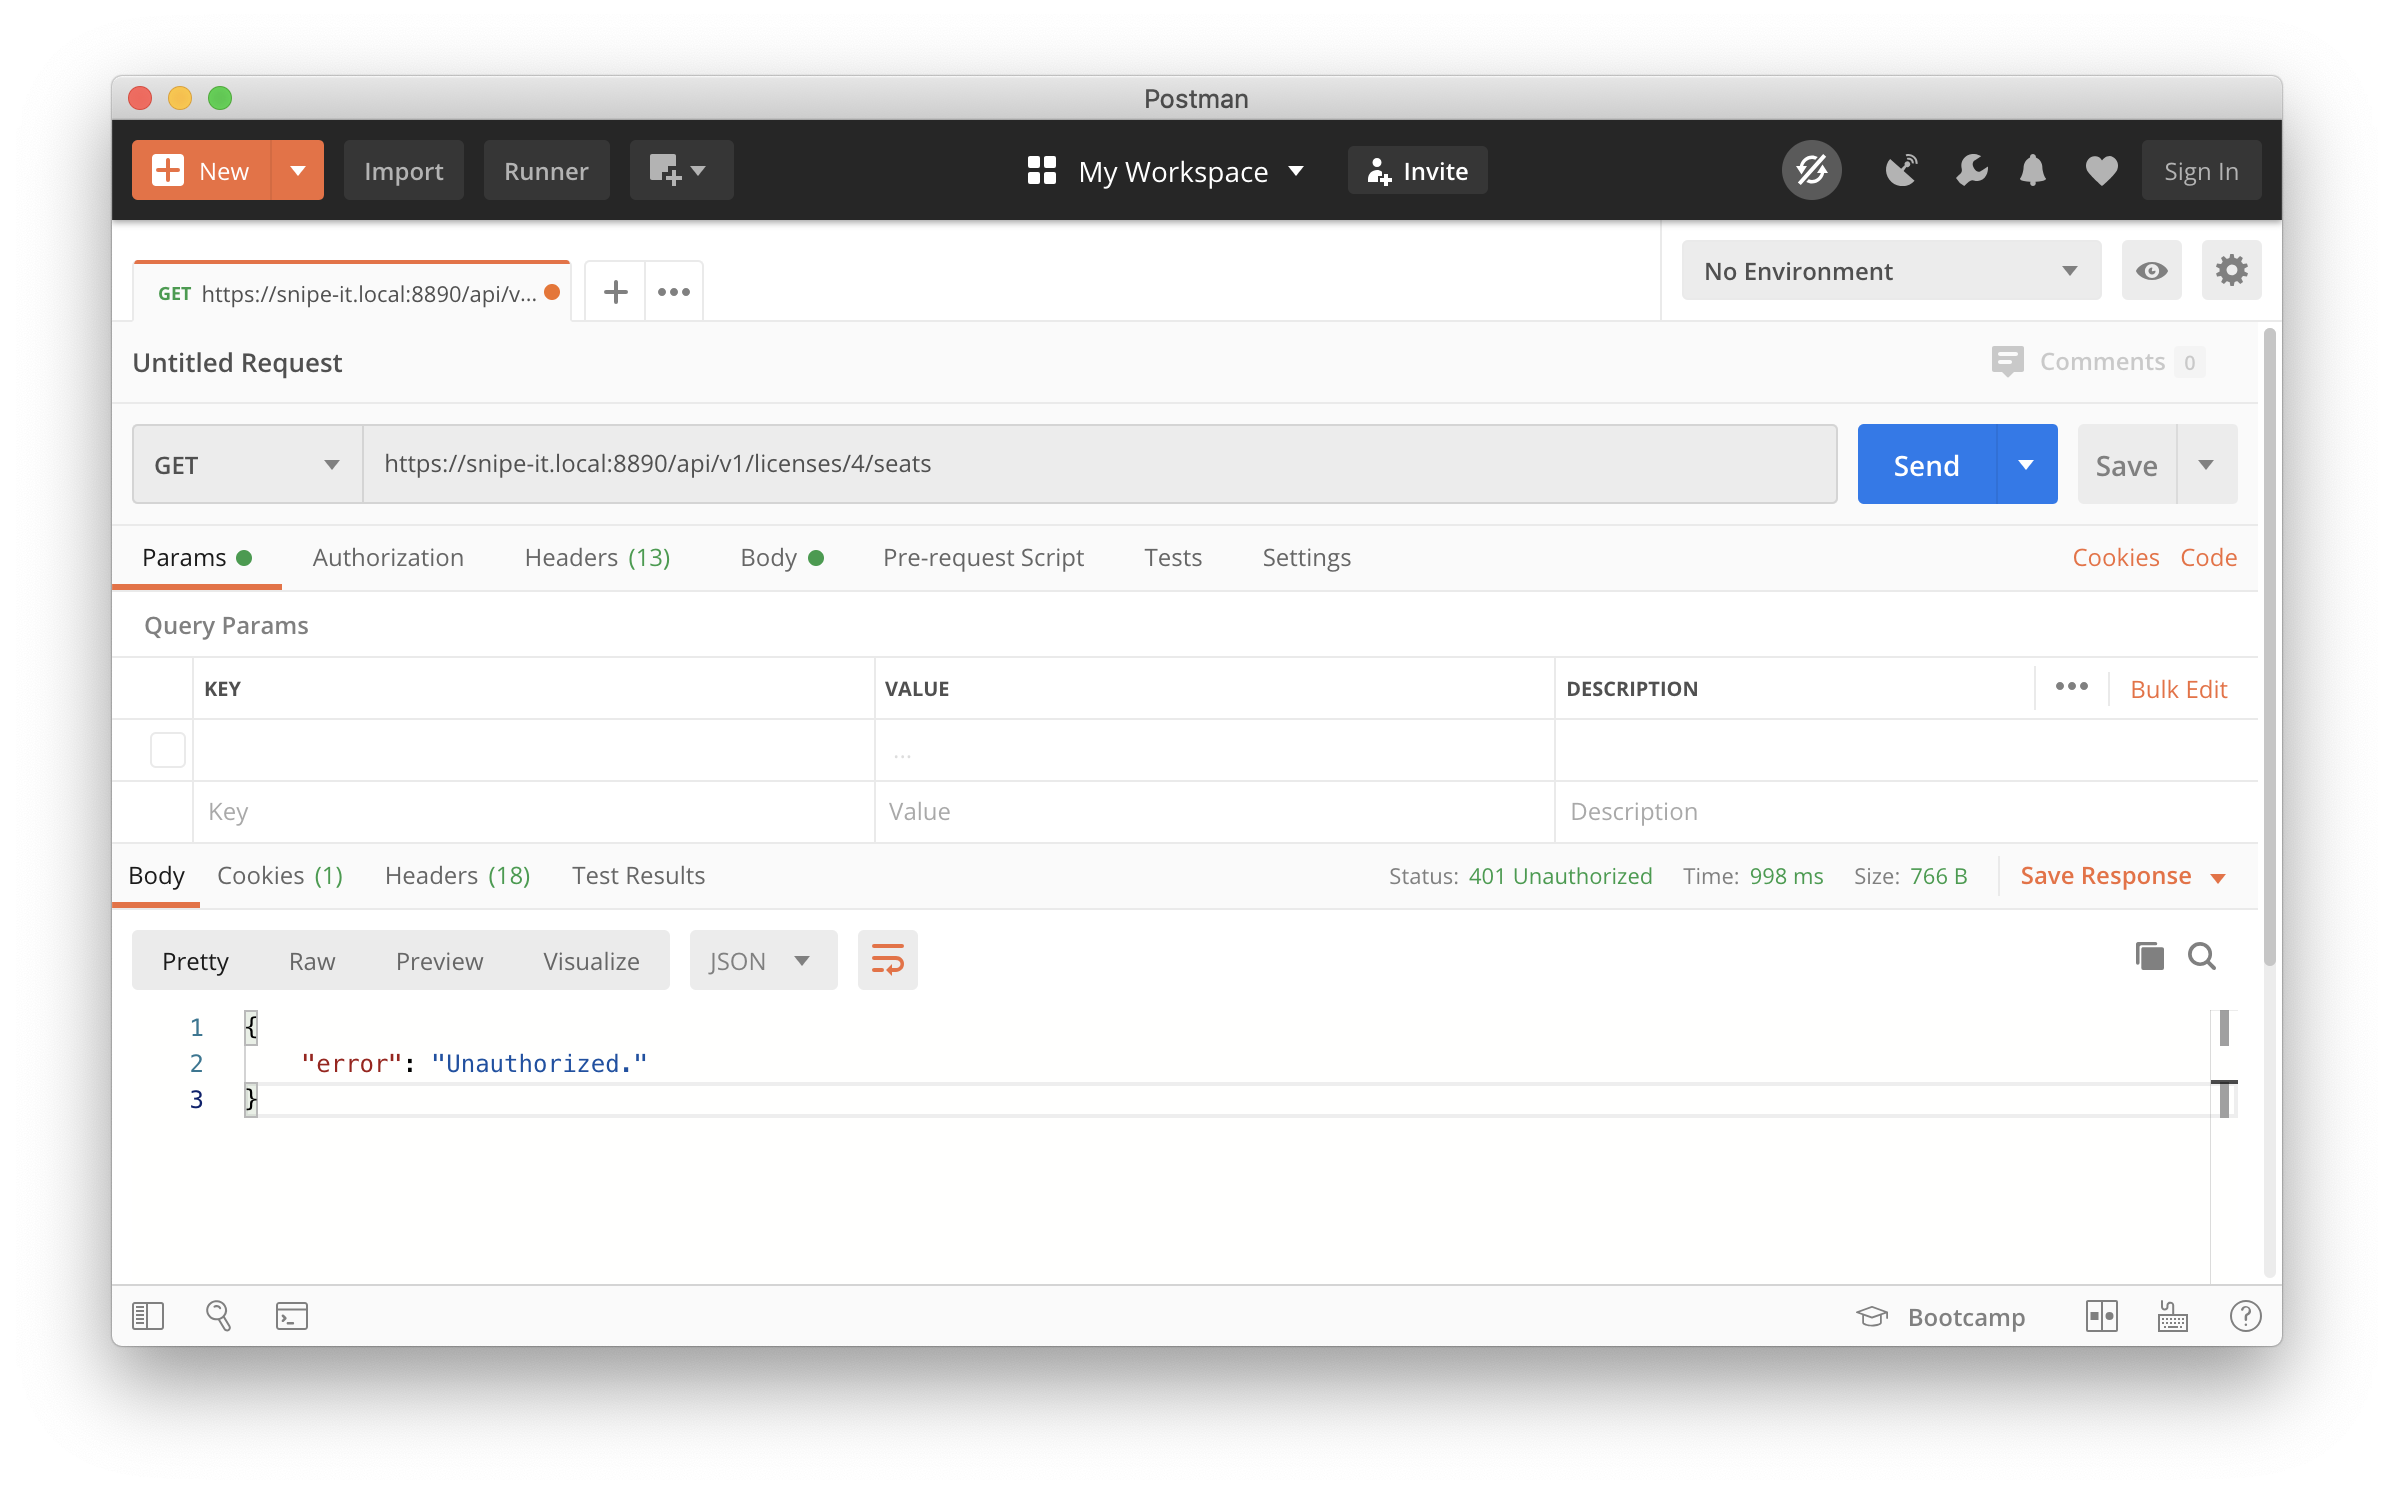
If you try to make requests to the API without your personal access token (or an incorrect one), you'll see the following from Postman:
NEVER SHARE THIS TOKENThis Personal Access Bearer Token should not be shared with anyone else, and should never be used in client-side javascript.
3. Setting it up in Postman
The quickest way to get started is to open a new Postman tab and enter your values directly, as documented in the Authenticating with the API section.
| Key | Value |
|---|---|
Authorization | Bearer MY-AWESOME-API-KEY |
Accept | application/json |
Content-Type | application/json |
Make sure you add "Bearer" before your API token, as pictured above and below. Simply putting in the API token without Bearer prefacing it will not work.
Where this can get confusing is exactly where to put these key/values. It's critical that you put these in the HEADERS section of the Postman interface.
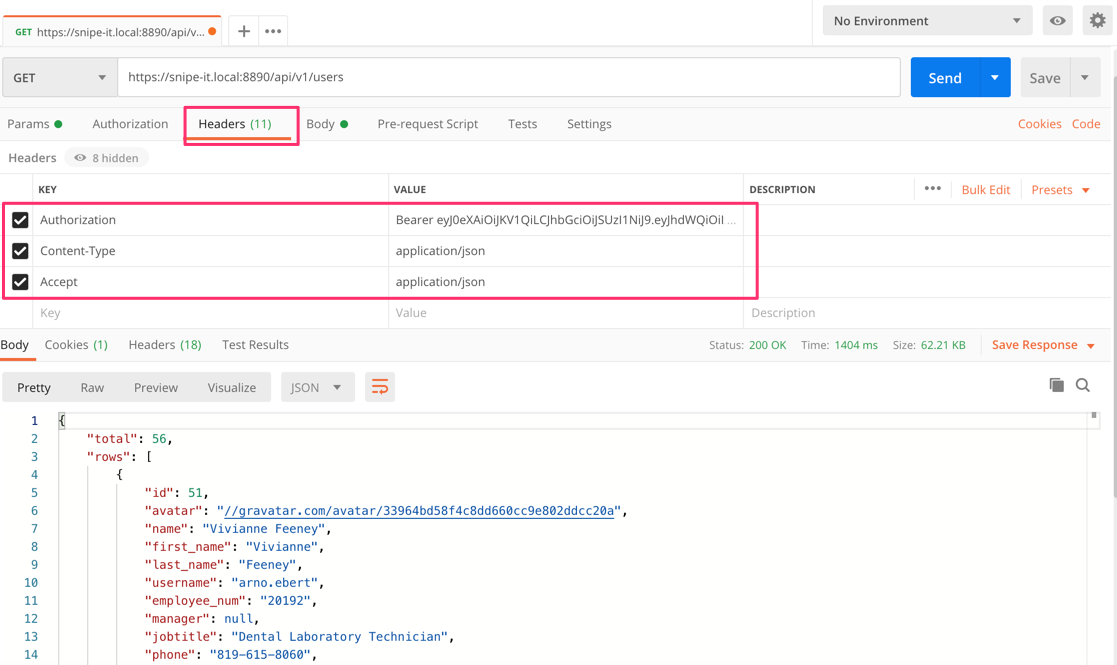
Once you have those three Header key/values set, you can immediately start using Postman to interact with the API.
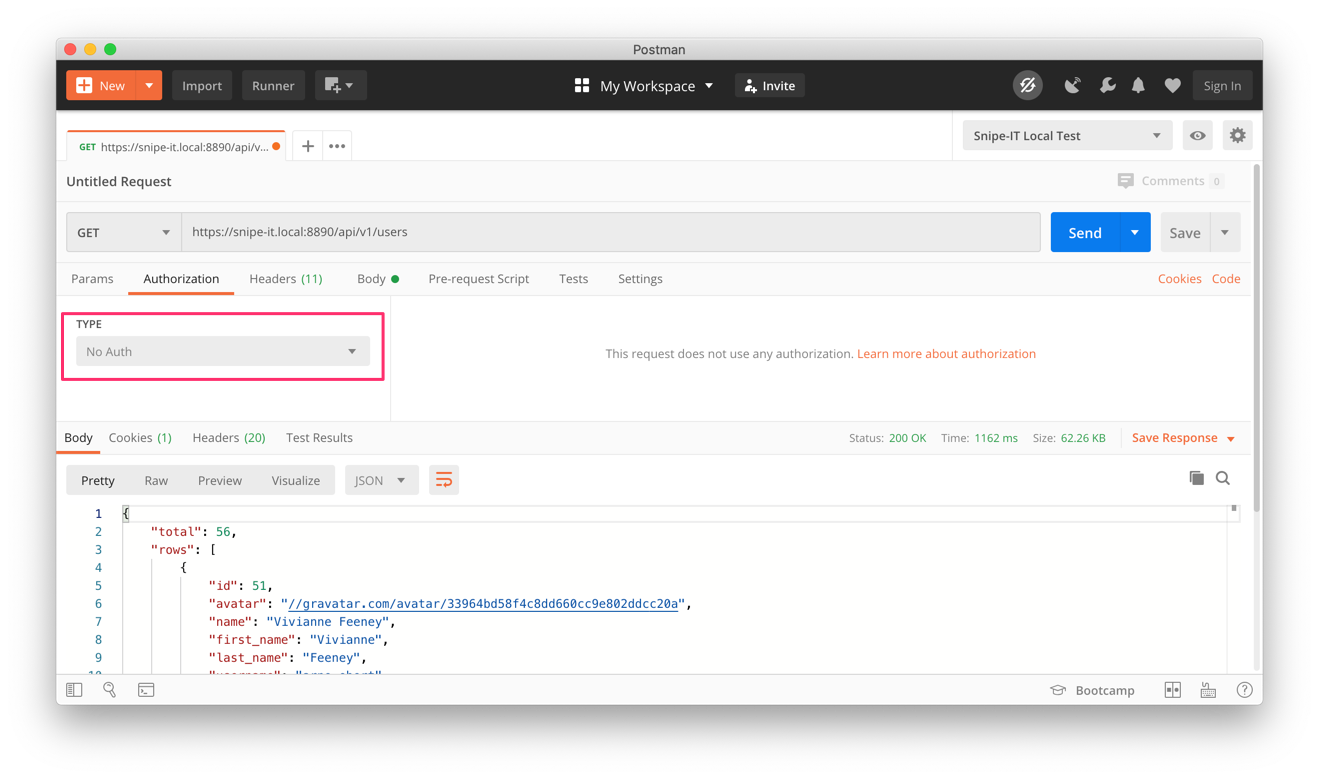
It's a little counter-intuitive, but in the Authorization tab of Postman, you'll want to select "No Auth". This is because you're already including the bearer token in the Headers section. (There are other ways to store your authentication tokens in Postman using Environments, but that's out of scope for this documentation.)
Example Doing a PATCH Update in Postman
In this example, we're going to do a PATCH update (one where we only update the fields we pass through the request) on a user in our database. The user's ID in our example is ID 51.
First let's start by doing a GET request to make sure the user we're about to update is the right one. In the Postman UI, make sure the method type is GET, pass the correct Snipe-IT user endpoint (/api/v1/users/51), then click SEND.
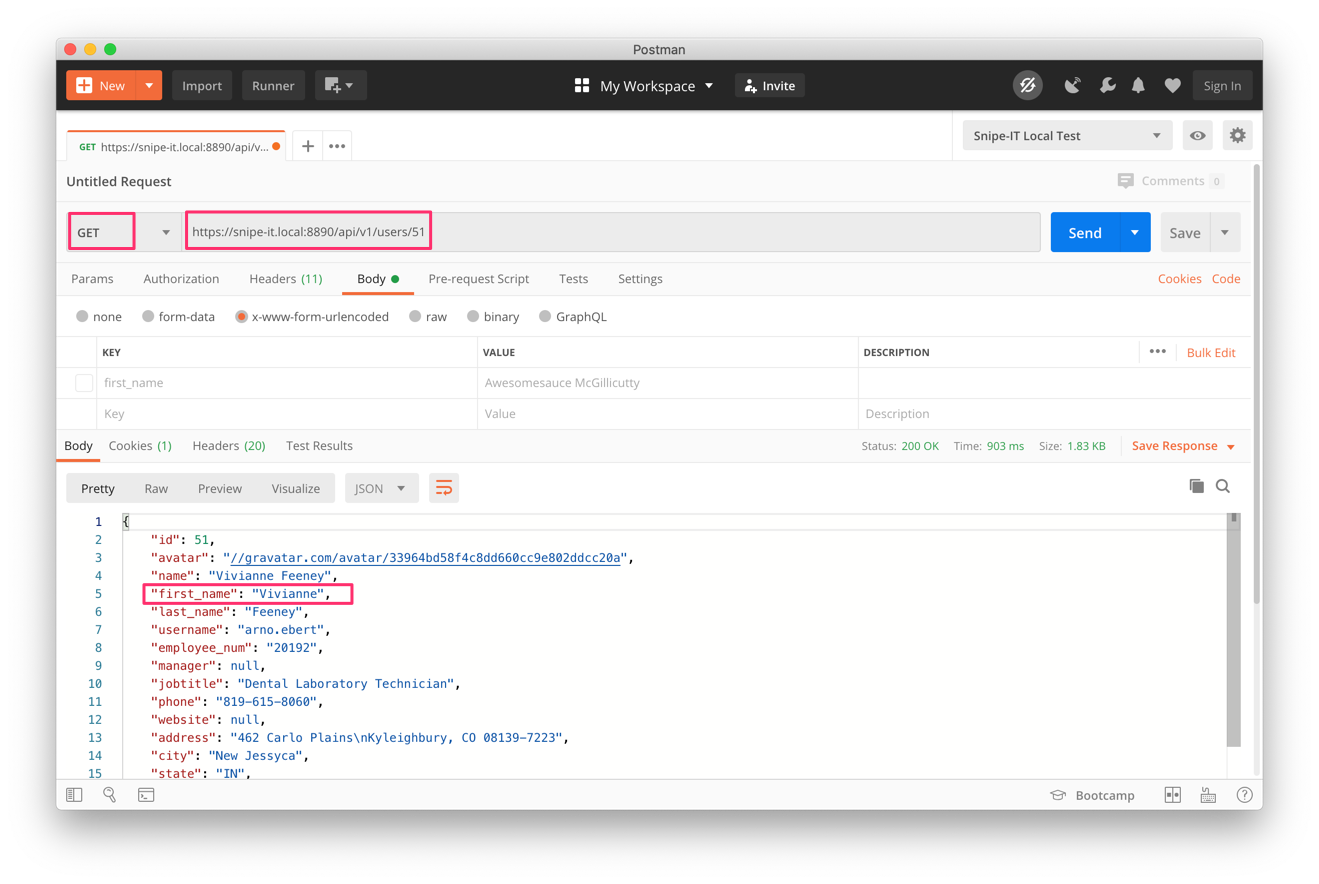
We can see that the record for user ID 51 looks correct via that GET request, so now let's make an update. We're going to update Vivianne Feeney's first name from Vivianne to Awesomesauce.
We need to change the method of the request to PATCH, and add a new field in the BODY tab, as seen below. Since we're changing the first_name record for that user, we need to pass the PATCH request first_name as a key and Awesomesauce as the value for that key.
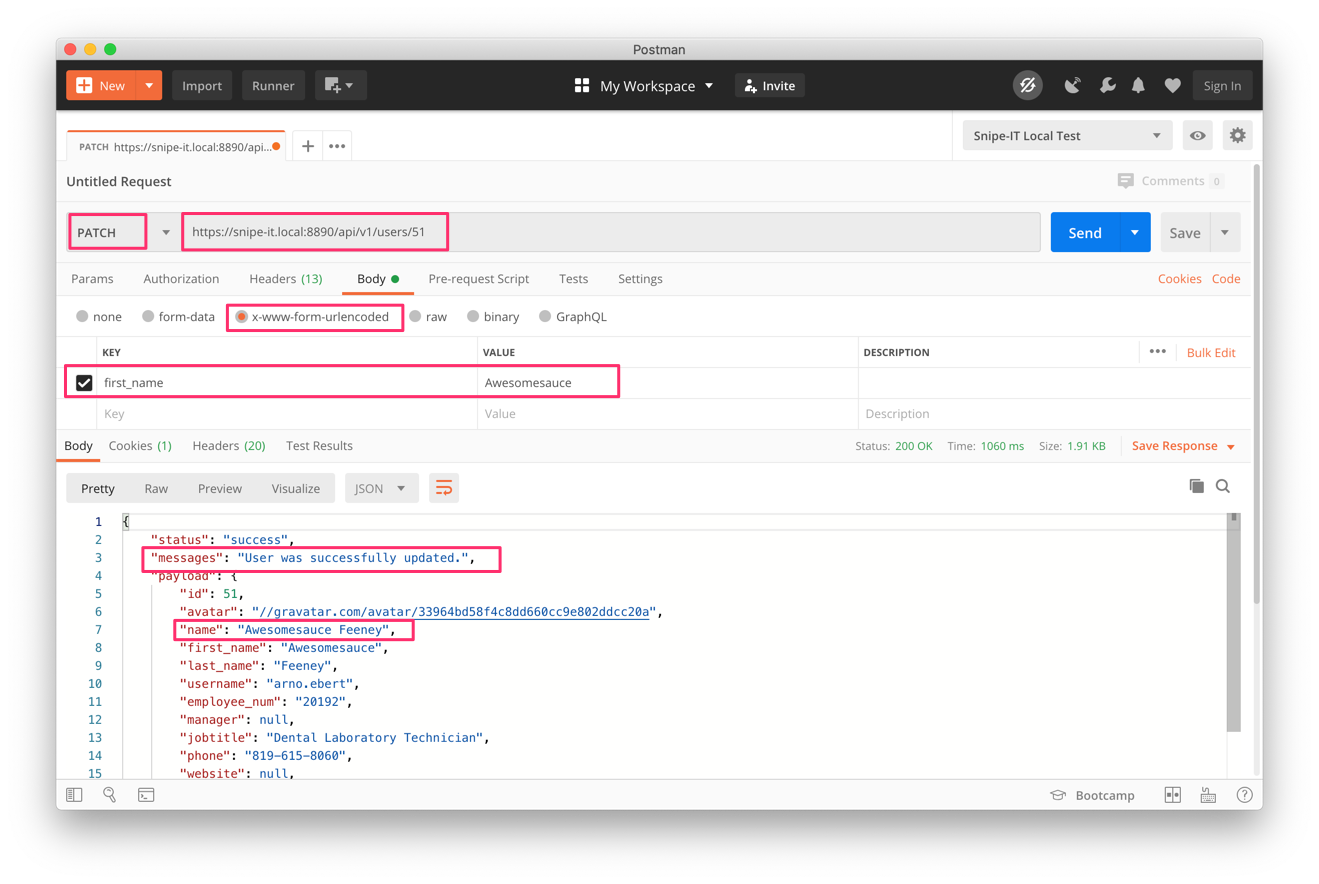
Once we've hit SEND, we can see that there is a success message, and the response we get back from the server shows us the newly updated user record with Awesomesauce as the first name.