Hosted LDAP Providers
Snipe-IT supports a wide variety of popular hosted directory services, some of which require special configuration or have settings that are less common than the ones outlined in the LDAP Sync and Login documentation.
For LDAP Sync Mapping Values not specifically listed here, you should be able to use the values given in standard the LDAP Sync and Login documentation.
Note that just as in the standard LDAP Sync and Login documentation, the mappable sync fields should usually be entered in all-lowercase in your Snipe-IT LDAP settings, even if they are mixed-case in your LDAP server.
Azure Active Directory/Microsoft Entra ID
Your Azure AD/Entra account needs to have the following:
- LDAP enabled
- Password hash synchronization enabled
- It must be accessible to the server running Snipe-IT on port 389 and/or 636.
Microsoft's documentation on LDAP is here: https://docs.microsoft.com/en-us/azure/active-directory-domain-services/tutorial-configure-ldaps
Specifically, an important part of that is:
Users (and service accounts) can't perform LDAP simple binds if you have disabled NTLM password hash synchronization on your managed domain.
Documentation on how to do that is here: https://docs.microsoft.com/en-us/azure/active-directory-domain-services/secure-your-domain
Note that, after enabling the password hash system, users must change their passwords first before they can login. This is not a Snipe-IT limitation, it's unfortunately built-in to Azure itself.
Okta
Snipe-IT LDAP/AD works with Okta, and you should use the settings below, changing the placeholder information to your actual Okta subdomain.
Okta LDAP Settings
| Field | Snipe-IT LDAP Settings Value |
|---|---|
| Active Directory | unchecked |
| Active Directory Domain | null |
| LDAP Server | ldaps://your-okta-subdomain.ldap.okta.com |
| Use TLS | unchecked (ldaps:// is already secure!) |
| LDAP Bind Username | [email protected],ou=users,dc=your-okta-subdomain,dc=okta,dc=com |
| Base Bind DN | dc=your-okta-subdomain,dc=okta,dc=com or possibly ou=users,dc=your-okta-subdomain,dc=okta,dc=com, depending on your configuration |
| LDAP Filter | &(uid=*) or possibly objectClass=inetOrgPerson, depending on your configuration |
| LDAP Authentication Query | uid= |
Okta LDAP Sync Field Mapping
| Field | Snipe-IT LDAP Field Mapping Value |
|---|---|
| LDAP Username Field | uid |
| LDAP Last Name Field | sn |
| LDA First Name Field | givenname |
| LDAP Active Flag | leave this blank |
Note that these may not be exact values, as it will depend upon how you've set up your Okta account.
Testing the LDAP synchronization might return a admin limit exceeded exception from the Okta LDAP Interface if you don't limit the expected results (see : LDAP Interface known issues ). To build your LDAP filter, see LDAP filter Syntax.
Here is a query exemple to limit the results that Okta should return :
(&(objectClass=inetOrgPerson)(organization=MyOrg)(organizationalStatus=ACTIVE))
JumpCloud
To use JumpCloud's LDAP-as-a-Service, please see the documentation on JumpCloud's website.
OneLogin
OneLogin LDAP Settings
| Field | Snipe-IT LDAP Settings Value |
|---|---|
| Active Directory | unchecked |
| LDAP Server | ldaps://ldap.XY.onelogin.com (with a region code like us or eu for XY) |
| LDAP Bind Username | [email protected],ou=users,dc=customer-name,dc=onelogin,dc=com |
| Base Bind DN | ou=users,dc=customer-name,dc=onelogin,dc=com |
| LDAP Filter | &(cn=*) |
| LDAP Auth Query | uid= |
Onelogin LDAP Sync Field Mapping
| Field | Snipe-IT LDAP Field Mapping Value |
|---|---|
| LDAP Username Field | uid |
| LDAP Last Name Field | sn |
| LDAP First Name Field | givenname |
Getting Partial Results only on large directories (>500 users)?OneLogin has a Pagination feature they need to activate for your account in order for Snipe-IT to see all of your users. Snipe-IT fetches users 500 at a time, and then uses pagination to get the rest of the results. Please talk to your OneLogin account rep and ask them to turn on paging for your account. Then Snipe-IT will be able to fetch all of your users.
Google Secure LDAP service
As of Snipe-IT v5.2.0, Snipe-IT now supports user syncing with Google Secure LDAP.
Part One: Google Workspace Configuration
Browse to https://admin.google.com and log in with your Google Workspace Administrator credentials.
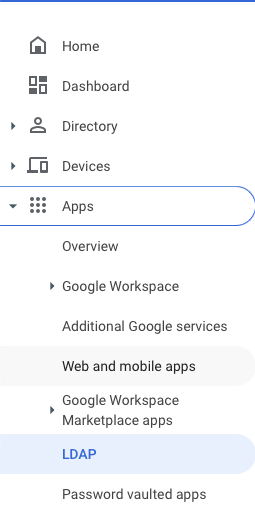
Click on the left icon bar and choose Apps > LDAP

If you do not see LDAP as an option, you may not have it on your account!Consider upgrading your account or purchasing the "Cloud Identity Premium" Add-On.
Click "ADD CLIENT" near the upper right
Name your LDAP connection (Snipe-IT might be a good name), and optionally add a description
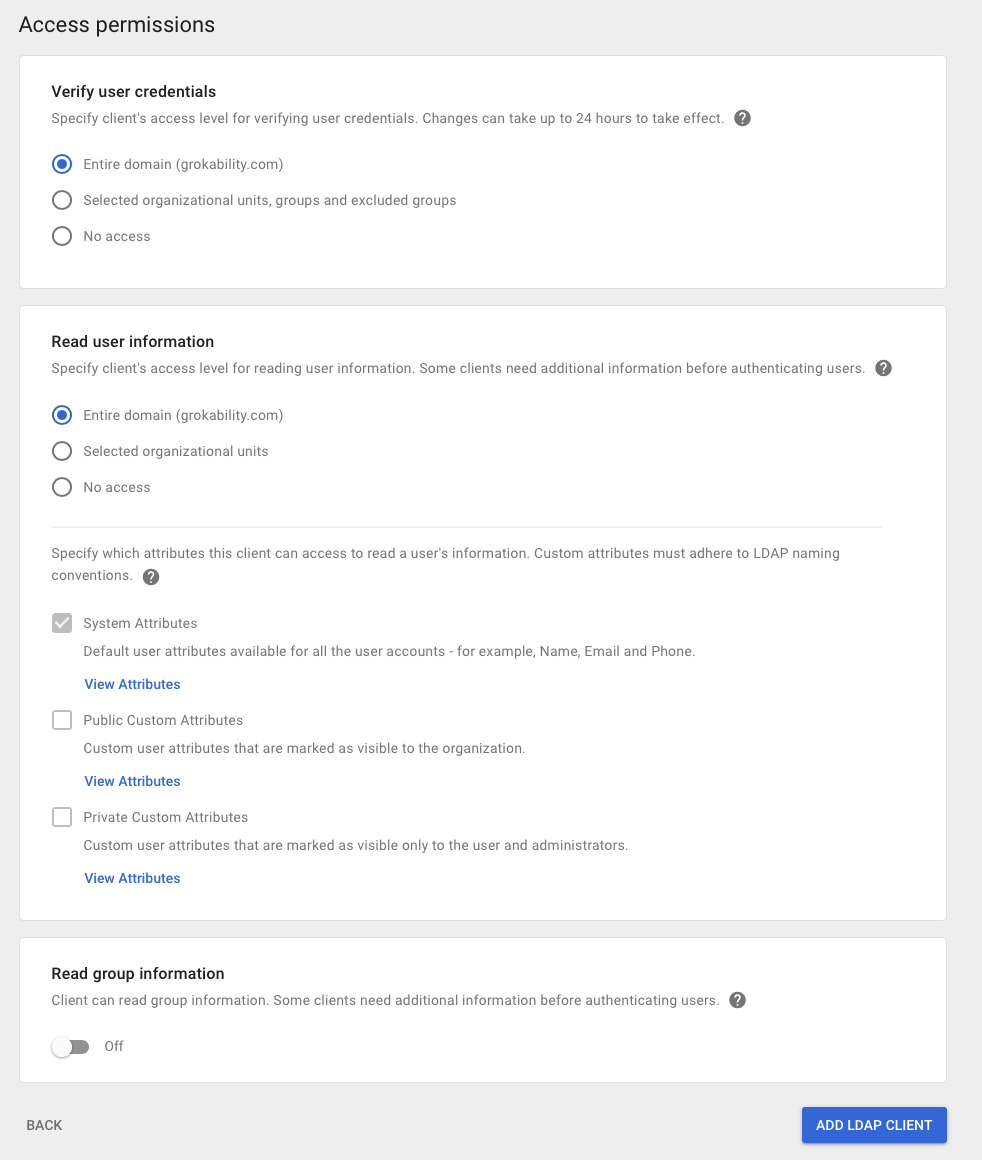
For Access Permissions, in "Verify User credentials" pick "Entire domain" (optionally, you can restrict it to selected OU's, groups, and excluded groups if you want to limit which users show up in your Snipe-IT instance).
In "Read user information" pick "Entire domain" (unless, again, you want to limit which attributes show up). Click "ADD LDAP CLIENT"

Click on "Download certificate". Then click "CONTINUE TO CLIENT DETAILS"
In the Authentication pane, click on Access Credentials, then click "GENERATE NEW CREDENTIALS". Copy both the Username and Password (both of which are randomly generated!). Paste the username somewhere safe so you can use it in a later step. To copy the password, you can click the 'eye' icon or click the button that says 'click to copy password'. Make sure to paste the password somewhere safe, as Google will not show it to you again once you close that dialog box.
Click on the upward-facing triangle near the upper-right.

Click anywhere in the Service Status Pane.

Click "ON for everyone" and then click "SAVE"

Part Two: Snipe-IT Configuration
In Snipe-IT, click the gear icon in the upper right. Click "LDAP."
Turn on the LDAP enabled checkbox.
Open the ZIP file that you downloaded from google. Open the two resulting files in any text editor.
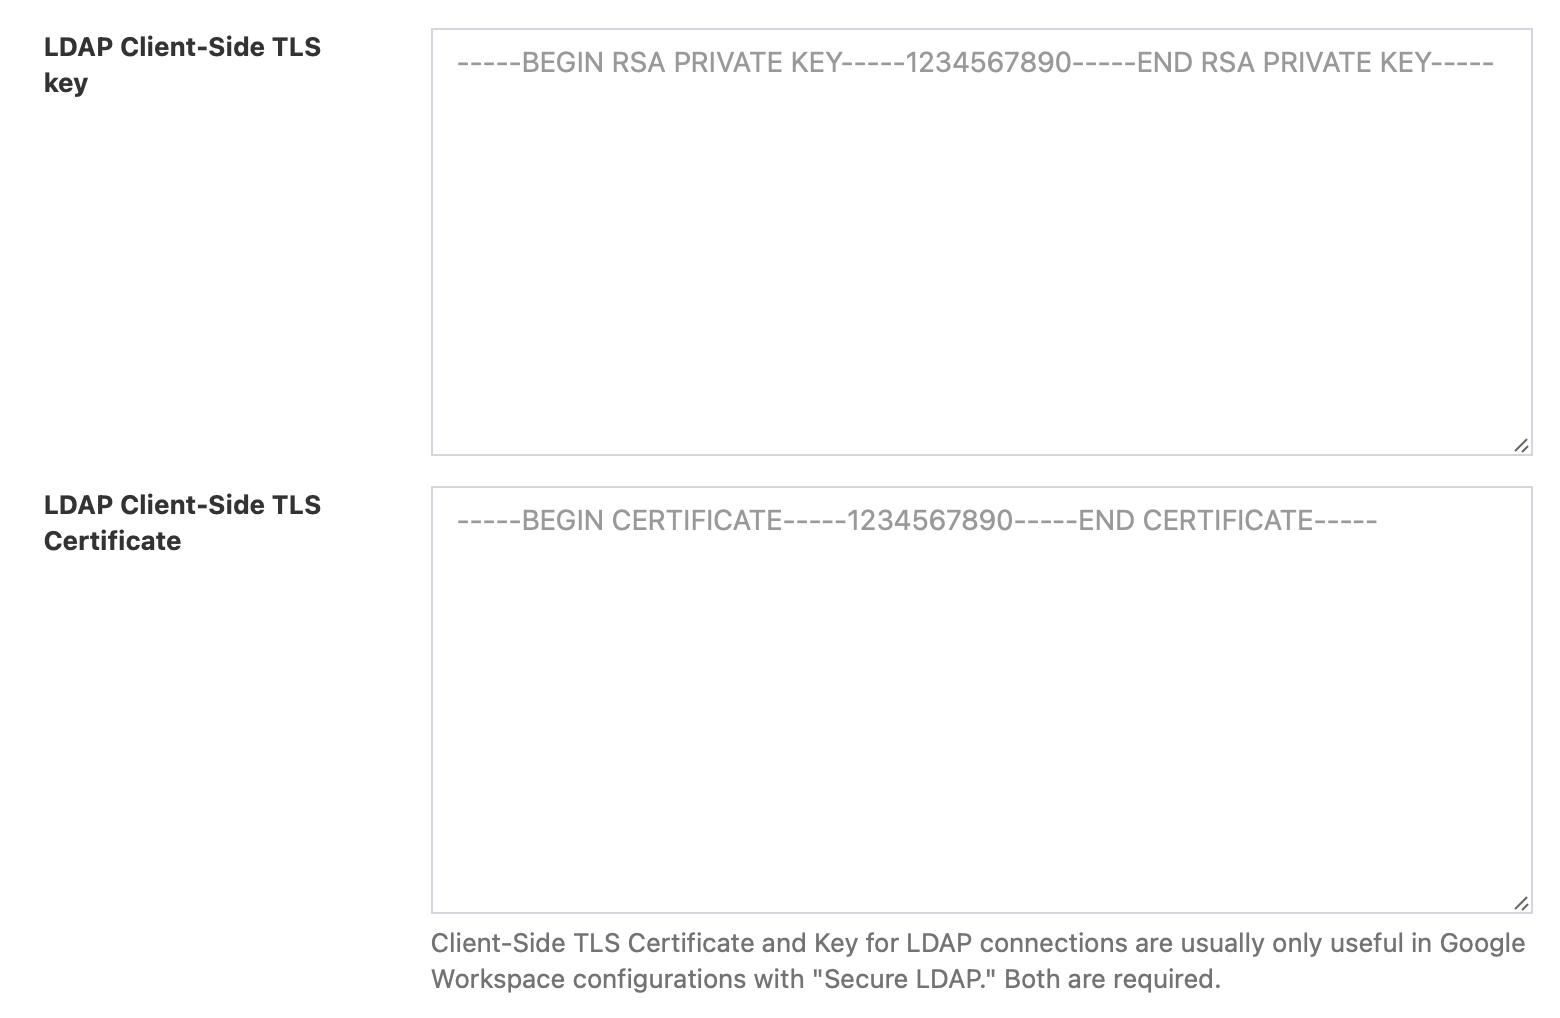
You'll find two new fields in the Admin Settings > LDAP configuration of the UI: LDAP Client-Side TLS key and LDAP Client-Side TLS Certificate. (Warning: some versions of Snipe-IT incorrectly display the LDAP Client-Side TLS Key field name as: admin/settings/general.ldap_client_tls_key. This has been fixed in a later release.) Paste the contents of the .key file into the TLS key field, and the contents of the .crt file into the TLS Certificate field.

Google Workspace LDAP Settings
Field | Snipe-IT LDAP Settings Value |
|---|---|
LDAP Server |
|
LDAP Bind Username | Enter the username you got from the Access Credentials step in Part One above |
LDAP Bind Password | Enter the password you got from the Access Credentials step in Part One |
Base Bind DN | Enter your domain with For example, for |
LDAP Filter |
|
Google Workspace LDAP Sync Field Mapping
| Field | Snipe-IT LDAP Field Mapping Value |
|---|---|
| LDAP Username Field | This should probably be mail, since you won't be able to login to these accounts using SAML SSO without it |
| LDAP Last Name Field | sn |
| LDAP First Name Field | givenname |
| LDAP Employee Number Field | employeenumber |
| LDAP Department Field | departmentnumber |
| LDAP Email Field | mail |
| LDAP Job Title Field | title |
Now click 'Save'.
You must click 'Save' before you can test your settings!If you click 'Test LDAP Synchronization` without having clicked the 'Save' button, the saved credentials, not the contents of the form you've been filling out, will be tested. This will be corrected in a later release.
After clicking 'Save', you can now return to the LDAP settings page and should be able to click "Test LDAP Synchronization." If that works, then your LDAP configuration is complete!
Note that since Google Secure LDAP does not currently support logging in via Secure LDAP, you'll want to configure your Snipe-IT instance to work with Google's SAML setup instead. (This is a limitation in Google, not with Snipe-IT.)
Updated 5 months ago
