
Downloading
Download Snipe-IT for a production installation with Git, a release archive, the installer, or Docker.
Download Snipe-IT for a production installation using Git, a release archive, the Linux installer, or Docker.
If you plan to contribute to Snipe-IT, use the Contributing guide instead.
1. Clone with Git (Recommended)
Choose this option if Git is already installed on your server and you want the easiest upgrade path.
$ git clone https://github.com/grokability/snipe-it your-folderTo update later, run git pull in your Snipe-IT installation directory.
2. Download the Source Archive
Download the release archive if you prefer to install from a ZIP file instead of cloning the repository.
Download the latest release from GitHub.
Unzip the archive into your new Snipe-IT installation directory.
3. Download the Installer
Use the installer only on a fresh Linux CentOS/Red Hat or Debian/Ubuntu system that has no other sites running on it.
circle-info This installer requires CentOS 6, Ubuntu 14, or later.
If you are using RHEL 7, enable the Extra Packages for Enterprise Linux (EPEL) repository first. EPEL depends on the Red Hat
optional(rhel-7-server-optional-rpms) andextras(rhel-7-server-extras-rpms) repositories.
$ wget https://raw.githubusercontent.com/grokability/snipe-it/master/install.sh
$ chmod 744 install.sh
$ ./install.sh
4. Use Docker
Use the Docker guide if you want to run Snipe-IT in containers.
File Structure
After you unzip the archive or complete the Git clone, your Snipe-IT installation directory should look similar to this:
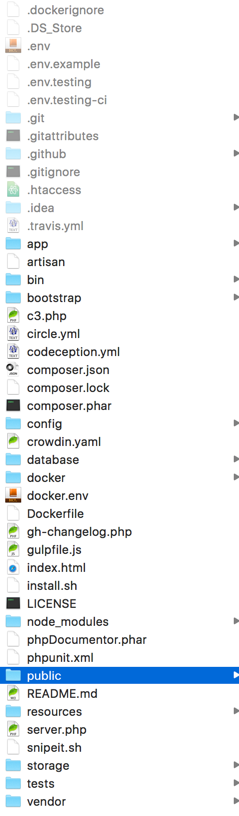
Use the public directory as your web root.
circle-info Use the highlighted
publicdirectory as your web root, not the top-level Snipe-IT installation directory.
Updated 3 months ago