
Importing Assets
You can find a sample CSV to start from in the source on Github.
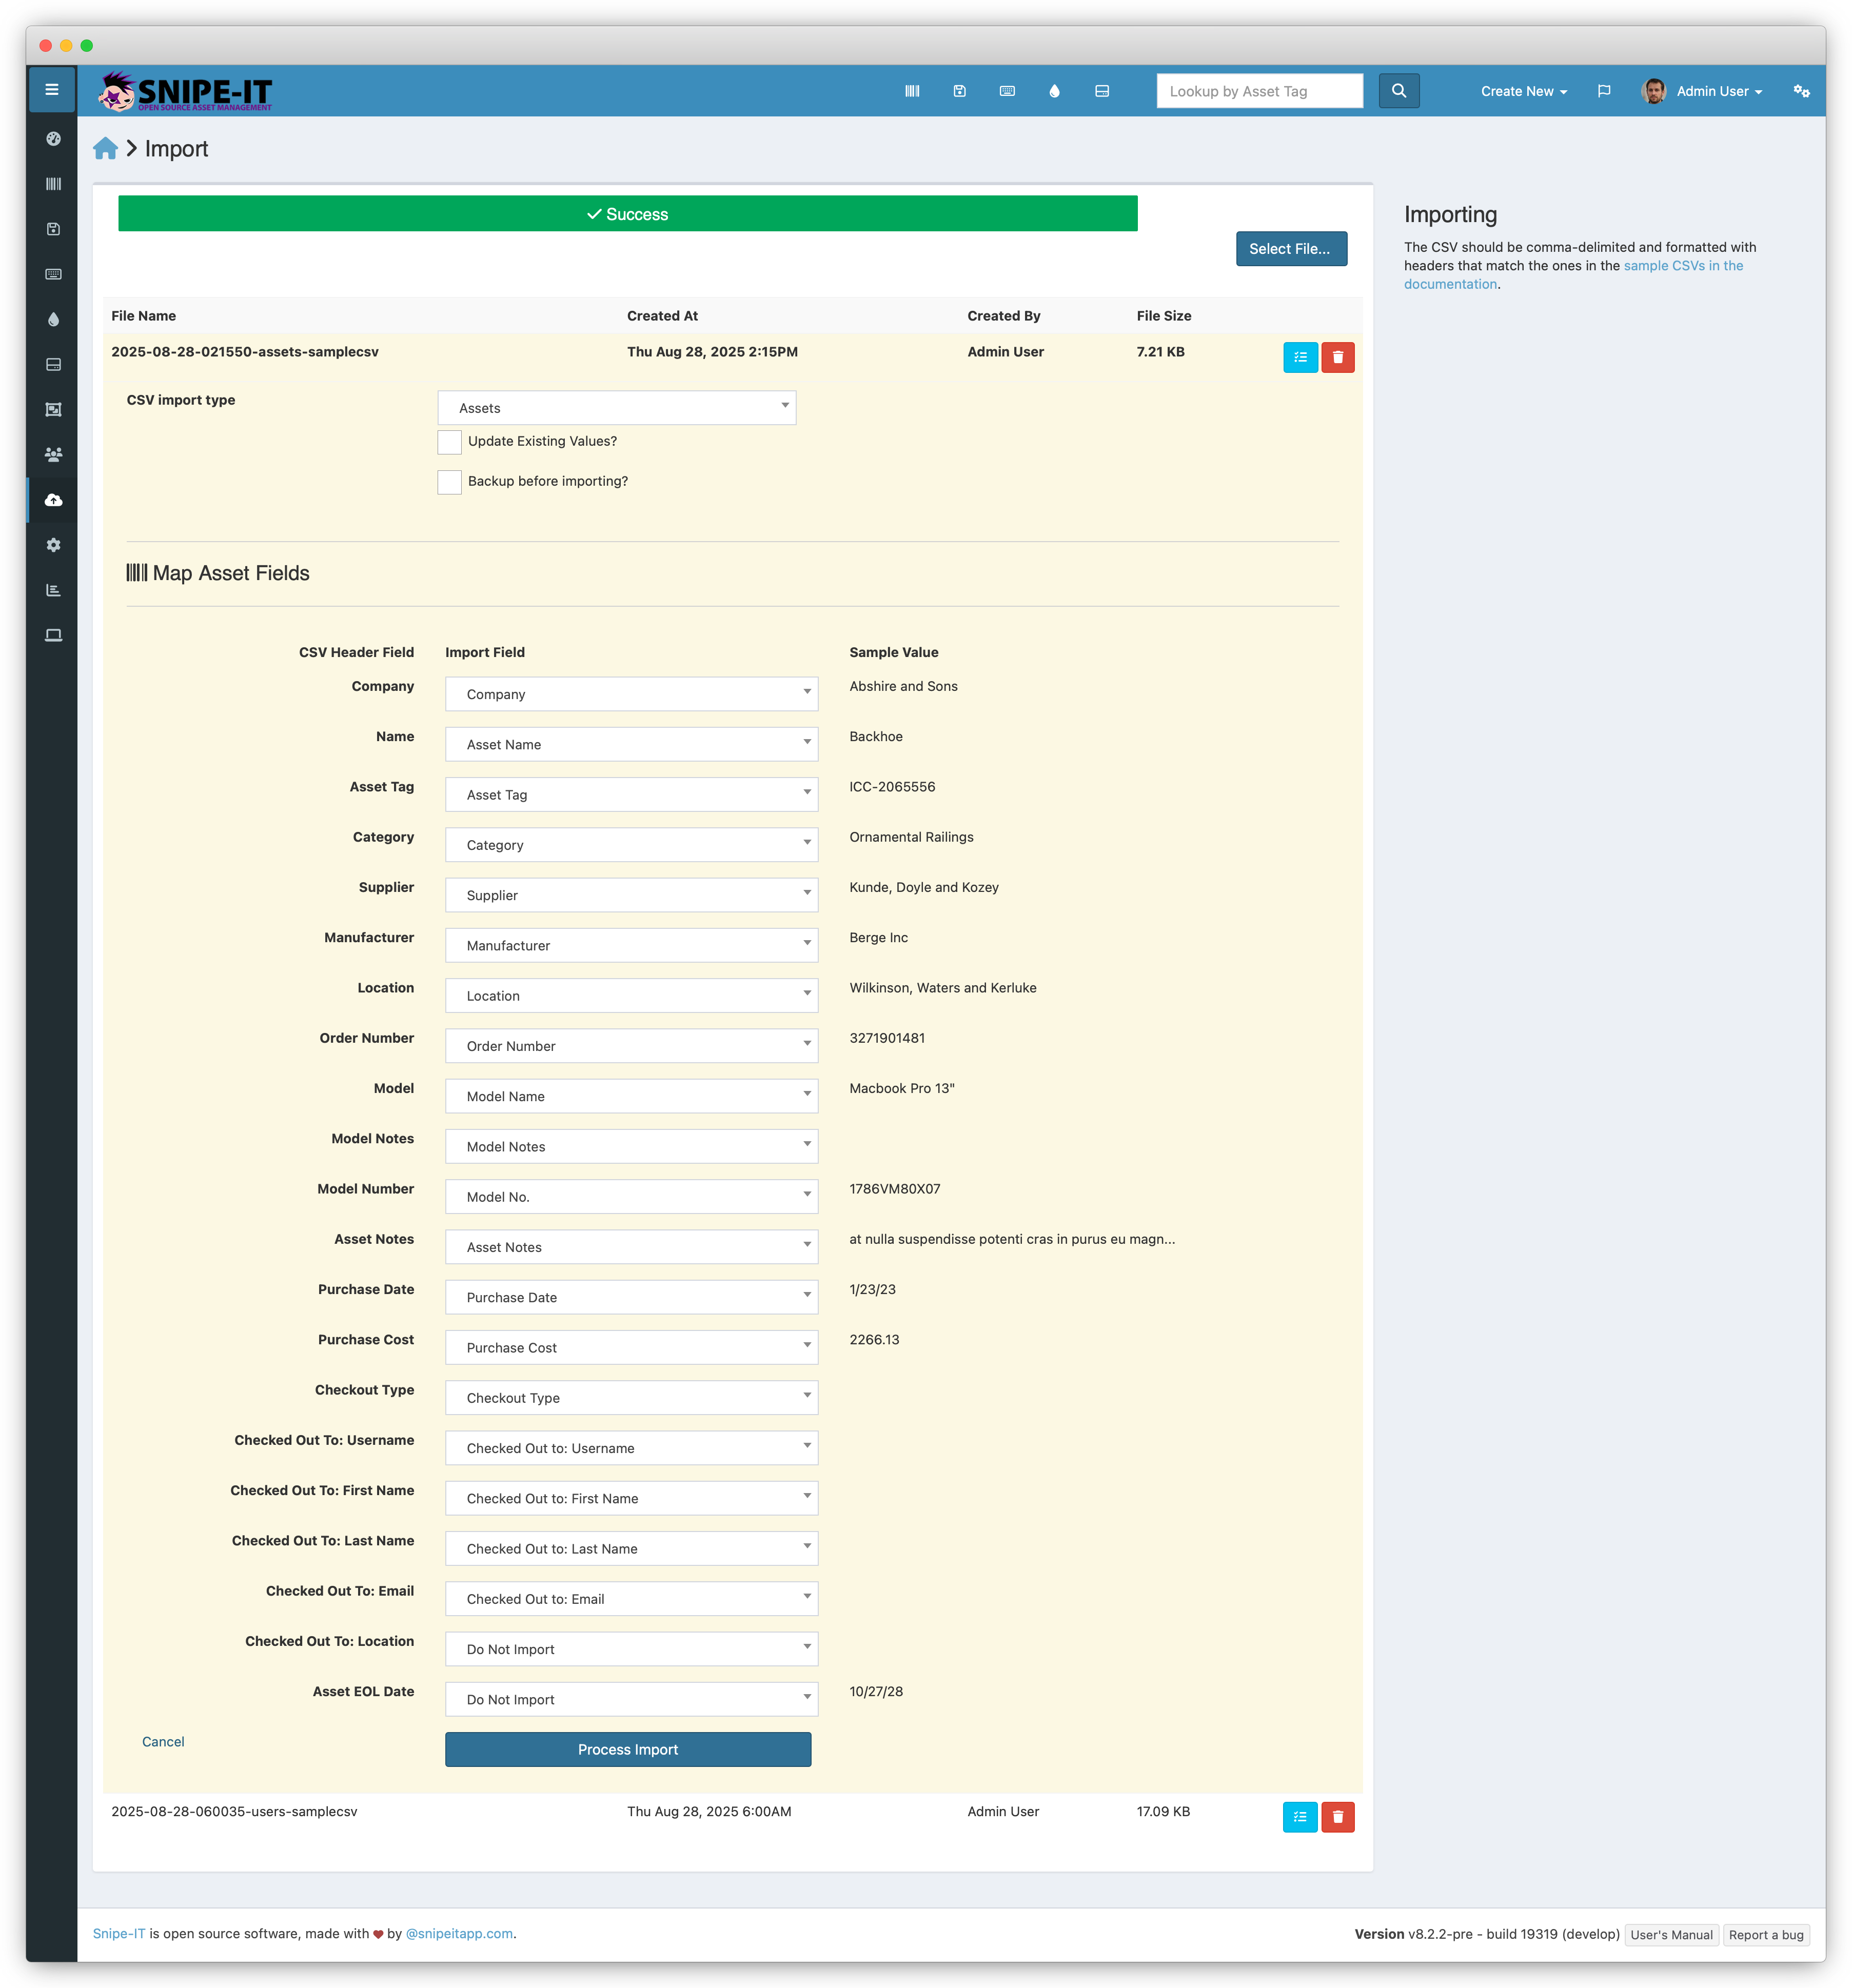
Mapping Asset Fields
| Field | Example | Required | Notes |
|---|---|---|---|
| ID | 123 | No | ID is only required if you are updating the asset's Asset Tag, otherwise the asset tag will be used to lookup the asset. |
| Asset Tag | GROK-12782 | On Update | Asset Tag will be used to lookup the asset to create it if it doesn't already exist, and update it if it does. If asset ID is provided in the CSV, it will supersede the asset tag. If you have Asset Tag Auto-Incrementing turned on in your |
| Name | Alison's Macbook Pro | No | A common name for the device. This often changes over time. |
| Serial | CN985796786987 | No | Serial number for the specific device. |
| Model Name | Macbook Air | On Create | The name of the asset model the asset belongs to. If the model name does not exist in Snipe-IT already, it will be created. |
| Model Number | Macbook Pro 12,1 | No | The model number of the asset, associated with the Model Name above. |
| Category | Laptops | On Create | The category the asset model should be created within. The category will be created if it does not exist. |
| Status | Ready to Deploy | On Create | The status label the asset should be assigned. If the import is intending to create and checkout assets at one time, this should be a deployable status label. |
| Notes | Created via importer - new batch of Chromebooks for Sept 2025 | No | A note field you wish to have associated with the asset. |
| Requestable | 1 or Yes | No | Whether or not users may request this asset. |
| Warranty Months | 36 | No | Numeric value for the number of months this item is under warranty. |
| BYOD | 1 or Yes | No | Whether this device is BYOD ("bring your own device"). While some organizations choose not to track BYOD devices, some do, as they may still be subject to specific terms and conditions of use within the organization. |
| Last Checkin | 2024-01-23 | No | Date of last checkin. Normally Snipe-IT will handle these dates for you as you c heck items in and out, but this is available in case you need to add new assets where that information hasn't yet been tracked in Snipe-IT. If provided, this value should be in |
| Last Checkout | 2025-08-25 | No | Date of last checkout. Normally Snipe-IT will handle these dates for you as you check items in and out, but this is available in case you need to add new assets where that information hasn't yet been tracked in Snipe-IT. If provided, this value must be in |
| Expected Checkin | 2025-11-10 | No | Date the asset is expected to be checked in. If provided, this value must be in |
| Last Audit Date | 2023-03-09 | No | Date of last audit. Note that this will NOT trigger an audit event with associated notifications and logging, it will simply update the date value. If provided, this value must be in |
| Next Audit Date | 2024-03-09 | No | Date of next audit. Note that this will NOT trigger an audit event with associated notifications and logging, it will simply update the value. If provided, this value must be in |
| EOL Date | 2025-10-11 | No | EOL ("end of life") date. While Snipe-IT normally calculates this for you based on other settings, you can override it here. If provided, this value must be in |
| Location | Lisbon | No | The name of the location of the asset. |
| Order Number | 39857958 | No | Order number associated with the asset. |
| Purchase Cost | 5590.00 | No | Cost of the asset. If provided, this value should not include currency symbols or commas, and should be in the XXXX.XX format. |
| Purchase Date | 2023-01-02 | No | Date the asset was purchased. If provided, this value must be in the |
| Default Location | Lisbon | No | The name of the location the asset is in when it is not checked out. |
| Checkout Type | user or location | No | What type of object the asset is being checked out to. |
| Checkout Target | jsmith | No | The username of the user the asset is being checked out to or the name of the location the asset is being checked out to. |
| Supplier | Mike's Tech Shop | No | Supplier name associated with the asset. |
| Manufacturer | Apple, Inc | No | Manufacturer of the asset. This manufacturer will be created if it does not exist. |
| Company | Grokability, Inc | No | The company name (in Settings > Companies) the asset should be associated with. |
Asset tag is no longer required if you have auto-incrementing enabled, however if you'd like to generate incrementing asset tags via Excel for some reason, you can do so easily using this helpful guide.
If you enter a status, the system will generate the status label for you, but you will have to go in and edit the status to make sure it has the appropriate attributes. For example, if an asset is "Archived Forever", you'll need to go into Admin > Status Labels and edit the attributes of the "Archived Forever" status label to reflect that it is in an archived state.
Fields to Map for Checkout on Import
If you wish to checkout assets on import, you will need to map these additional fields:
| Field | Example | Notes |
|---|---|---|
| Checkout Type | user | The type of object the asset is being checked out to, user or location. user is implied if this field is left blank. |
Mapping Fields for Checkout to User
If the user already exists in the system and you would like to check an asset out to them, you can simply provide the username. If the user does not exist in the system, you will need to provide the full name, username, etc.
| Field | Example | Notes |
|---|---|---|
| Full Name | Jane Smith | Full name of the user Snipe-IT will create and check the asset out to. |
| Username | jsmith | Username of the user Snipe-IT will create and check the asset out to if they do not already exist in the system. |
[email protected] | Email address of the user Snipe-IT will create and check the asset out to if they do not already exist in the system. |
Mapping Fields for Checkout to Location
| Field | Example | Notes |
|---|---|---|
| Location Name | Room 123 | Location will be created if it does not exist. |
Importing Custom Fields
To import values for your custom fields, you MUST create the custom fields in Snipe-IT first. Once all of the custom fields you want to import to are created in Admin > Custom Fields, you can simply add additional columns to your CSV. Make sure the name of the Custom Field exactly matches your existing Custom Fields. Fields that cannot be matched will be skipped.
You'll still need to create Custom Fieldsets, assign your new Custom Fields to those field sets, and assign them to your newly imported models once you're done with your import.
We don't currently try to create your fields on the fly, or try to assign them to Custom Fieldsets and Asset Models because bad data could make a real mess of things if we did. Future versions will have a nicer Web UI interface that will allow you to handle some of those tasks on the import.
Custom Fields are stored as plain textCustom fields formatted as 'dates' should be in the format:
YYYY-MM-DD.Custom fields formatted as 'Checkbox' should be written as
value1, value2, value3- with a comma, and a space in between each value.
Updated 3 months ago